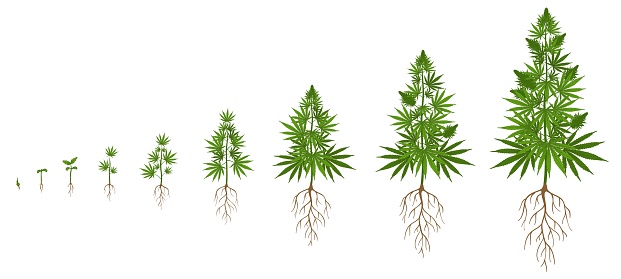
I have always been of the opinion that if you can, you should grow your own. Loose the dealer and/or dispensary and just dip into your own secret stash. You’ll have complete control over everything and because of this, you’ll know exactly what’s in it. How do you go wrong there?
As of the 1st of October 2021 Connecticut patients have been allowed to grow their own medicine. Each patient is allowed to have 3 plants in flower and 3 in veg, with a maximum of 12 plants per household. Everything must be done indoors and out of the eye of the public. Non-patients get to start growing next year. Got it? Okay, no problem.
For any of you who don’t know me, know me. I graduated 53rd class of Oaksterdam University in Oakland, California, back in 2010. While at Oaksterdam University, one of the areas of study was horticulture, and one of the instructors of this course was one of the grow gods, Ed Rosenthal. That guy was AMAZING. He REALLY knew his stuff and was super DUPER cool. The most significant part was he showed us everything he knew. Up until this point, I was never in an environment that allowed for home grow. However, times have changed, and the landscape is now very different. I kept excellent notes, now we grow…
So… What do you need to grow? I pulled out my old list to review. Some of the tech and the genetics have changed, but it’s still all relatively the same.
Items you will need to start your grow:
You need seeds.
Lighting
Ventilation (Air Flow Is Very Important)
Select Growing Environment (This is when you decide on how you are going to grow. Soil, Coco, or Hydroponics)
Containers for your plants while in their medium
Nutrients
Water
Before we start building and/or putting things together for your grow, we have to germinate some seeds. Once this process gets started, you’ll want to start putting the rest together pretty quickly, and you’ll have about 2 weeks before their new environment will be necessary. And for the sake of this series, just so you guys know, I’ll be using dirt as my medium. Dirt don’t hurt!
So now we are going to need a few things to sprout the girls:
1. Seeds from your favorite weed
2. Plastic container
3. Paper Towels
4. A spray bottle with clean water at room temperature
5. A small cup of water
6. Time (Germination could take anywhere between 12 hours and 7 days depending on the seeds)
Something you may want to consider before beginning your process is to do a seed soak. Get your seed (I’ve kept mine in the fridge). This will mimic the season changing from winter to spring.
Let’s start with 4 sheets of paper towels. Line the bottom of your container with 2 sheets and then spray with your room temperature water. Now lay out your seed across the moist towelette and give copious spacing between seeds. Cover the seeds with the additional 2 towels and spray again with your room temperature water. Finally, place the lid on the container to an area that is warm and dark (if possible) and leave it there.
You’ll want to open the container periodically and respray with your room temperature water. It’s important to NEVER let the paper towels dry up. The towels must stay moist for the duration, or the seeds with not sprout. Another essential thing to note is that the towels need to stay moist, not soaking wet. Too much moisture will drown them, and they will never sprout.
What are the best conditions, you ask?
25°C or 77°F with humidity between 70% and 90%.
These are definitely the first steps to starting a home grow. There are other options to promote germination, but this is what I like to do to kick off any grow.
One last quick note… Always date everything. This will be crucial in determining when to add nutrients and switch light cycles.
Once these little balls of joy sprout, we’re going to be putting together the tent, lights, and ventilation systems for the next installment of this journey.
I be following up again in about 2 weeks and we’ll put together a tent and some lights. Win, lose, or draw… I’m going to write about the entire process along the way. Let’s grow together.


